
It is not once or twice that you have seen people’s Tumblr description having a link, right? Most of the time, you wonder how they were able to do so. Trying to figure out this by yourself can be quite challenging. However, as you will come to see, it is a straightforward task to do – all you need to have us a little bit of basic HTML knowledge.
Here are the simple steps that you can follow on how to add a link to Tumblr description:
Step 1- Open Tumblr
You can open Tumblr by going to its dashboard or merely opening the app.
Step 2: Log in to your Tumblr account
Key in your information (passwords included). If you already have Tumblr will open automatically without you having to key in the data.
Step 3: Open your account page by clicking the account button
The Account Button is mostly found in the top right-hand corner. It looks like a small circular structure placed on a half-circular structure, but a bigger one. I tend to think that their idea was for it to look like a person or a passport-sized photograph.
Step 4: Select the Tumblr account that you want to edit
This applies to people who have multiple Tumblr blogs. On the Account Button, select the blog which you want your link to appear in.
For those with only one blog, you can skip this step.
Also Read: How to get a backlink from Wikipedia?
Step 5: Open the ‘edit appearance’ option
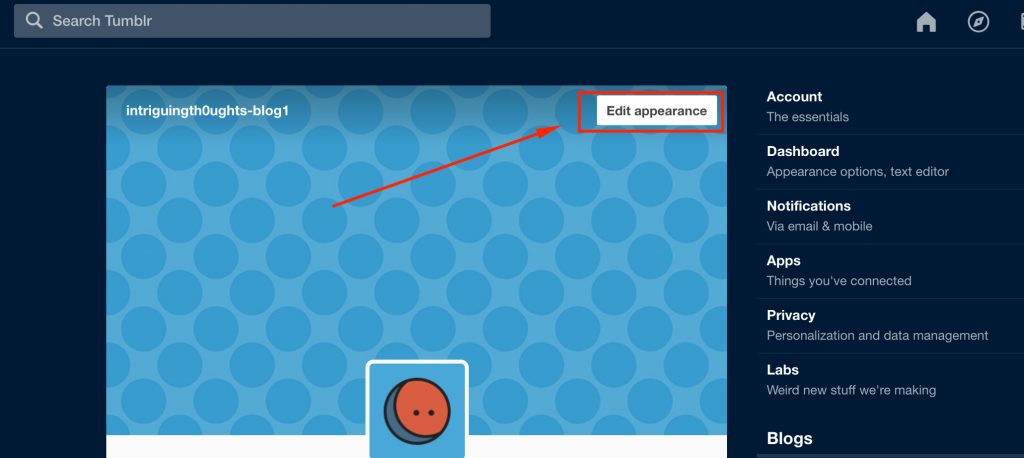
You are not limited to just a single way of getting to this option. It does not matter how you reach it. After selecting and opening the Tumblr that you want, click on the account button again and look for the ‘edit appearance’ option. Click on it.
Step 6: Edit your description
Step 5 should give you the ability to make a direct edit to your heading and description. You can just type in your awesome heading and description.
Now it’s time to add a link to the description.
Write it or copy the code as follows:
<a href=”https://www.yoururlhere.com”>Your anchor text</a>
After writing this, you can then replace “https://www.yoururlhere.com” with your website that you want to link out from your Tumblr.
Add your own anchor text or replace the one in “Your anchor text“. This is the clickable text that you want to appear in the description. Only the anchor text is visible to the front end users.
Don’t forget to close your code with “</a>” after adding your anchor text—the last thing you need to write to finalize the code.
At the end of this step, you should have a link that looks like the one below.
Code view: < a href=”https://www.seomandu.com/”>Check out my personal site</a>
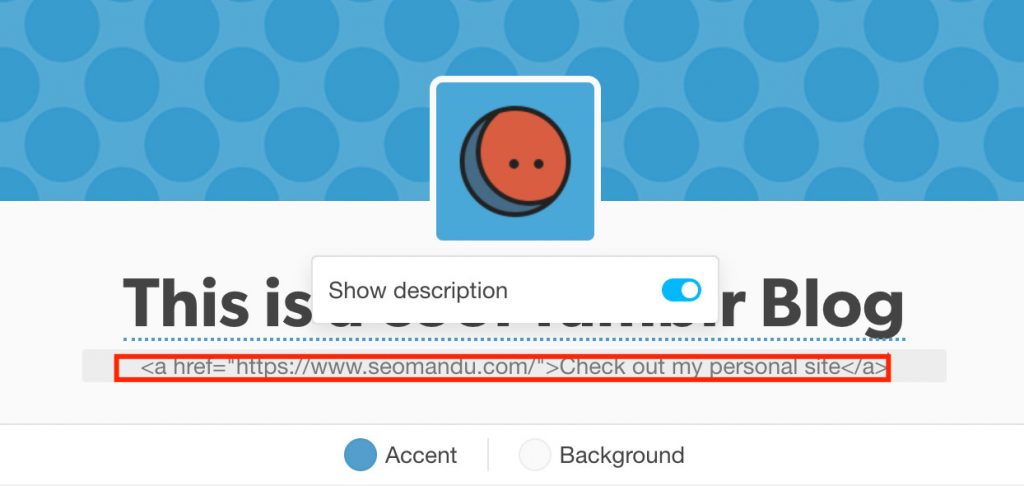
Preview: Check out my personal site
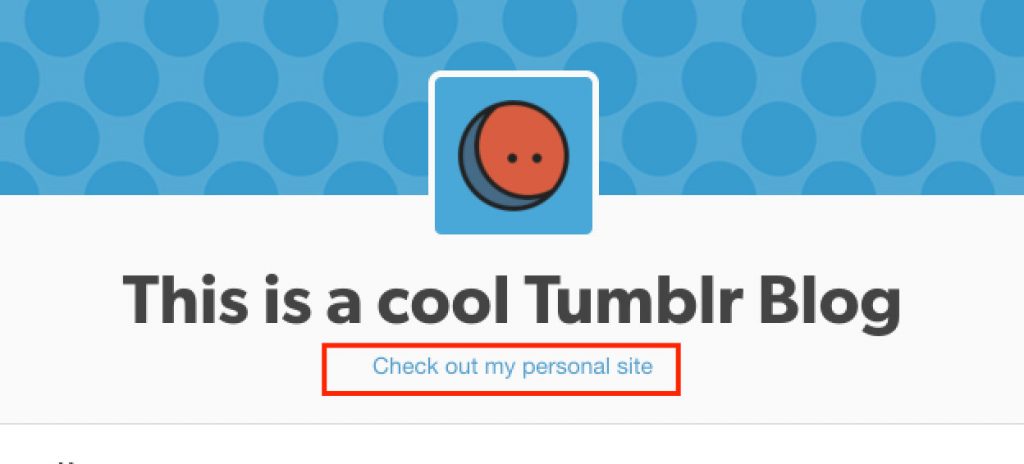
You are done! Now you have an awesome anchor text in the description that links to your desired url. Take the link above, for instance. It links to the homepage of this blog. The text to be displayed will be “Check out my personal site”.
Here is a detailed tutorial on anchor text.
Sometimes you find yourself in a situation where you are not sure how the URL specifically appears like. This is cause for no alarm. You have to go to the page which you want to be attached to your Tumblr blog. Copy the URL from there and paste it on the link. It is that easy!
An essential tip for you to consider is that all the characters you have seen in the link are entirely necessary. That means that if you do not key in one quotation mark or you close the whole link wrongly, the result won’t be as you expected, and your link won’t work. Counter-checking your work before going to the next step is advisable. You can also employ an easier way of writing this code and avoid omissions. You can first write the code on a notepad file.
After you finish, counter check the HTML code and see if it is correct and okay. If it is, highlight the code and copy it. After that, open where you are planning to have it copied and paste it there. Although not compulsory, this is a step that goes a long way in ensuring you don’t repeat the whole thing over and over, especially when you are dealing with pretty complex and complicated codes.
To add to that, it is good to note that you are not limited to only one link. You can include multiple links if you wish.
Step 7: Save your work
You have come a long way in creating the whole thing. You have one last thing to do, and everything is ready, saving the document. It might be an easy step but most definitely very important. You have to press the save button to ensure that all you have been doing is saved and ready. Failure to do so will render everything you have been doing useless. You don’t want that, do you?
Step 8: Test your links
After you are done, and the link is created, don’t just assume you nailed everything. You have to test whether or not the link works. Click on it and see if it does lead you to the page you wanted. If it does, congratulations, you have done it. If it doesn’t, you will have to double-check the link or repeat the whole process. However, this will rarely happen if you were keen all through the process.
It has been said that your link might disappear after you edit the Tumblr after saving the description. To be on the safe side, you can copy the code on a notepad file or TextEdit and have it saved. That way, you won’t have to repeat the whole code over again, but you’ll just copy-paste it.
As we have seen, adding a link to your Tumblr description is a walk in the park. You just have to be keen and careful all through the process, and you are good to go.
thank you for your tips